
Are you the kind of person who gets excited at the thought of a challenge? If so, the Nel Drip method for brewing coffee is the one for you. When done correctly it’s arguably one of the most technically demanding methods around. Why is it so challenging? While most steps are not complicated, the resulting taste is heavily influenced by water temperature, coffee age and pour speed. Controlling all three makes the replicability of that perfect cup very difficult.
But if you’re up to the challenge, here’s what you’ll need:
- 5-8 min
- Coffee & Grinder (1-3 weeks aged coffee is best)
- Kettle & Water (a kettle is highly recommended to control the pour)
- Nel Drip Set
- Scale
- Flat Edge Utensil
- Timer
There is no standard coffee to water ratio for this method due to the variability of the results, but the accepted range is between 1:8-1:15 respectively. If using fresh coffee, make sure to increase the ratio of coffee to water. For this guide we’ll use a ratio of 1:10 which will amount to 30 g coffee and 330 g water. Also for this guide, we won’t stress the temperature variable but, rather, make a note to the reader that if you want to truly master the Nel Drip, you should start using a thermometer and recording the results.
Let’s get started. If you’re using a new kit, make sure to soak the filter in hot water for about 5 minutes. Remove, wring and slide the filter onto the metal ring. It should also be noted that this method often results in a cooler (temperature) cup of coffee. That said, some guides instruct you to preheat your mug and/or the Nel bulb. This is entirely your choice, but if this is yourfirst time, we’d recommend trying it first as directed below, then adjusting variables as needed.
Step 1
Bring your water to a boil. While this is happening, prepare the coffee.
Step 2
Measure and grind 30 g of coffee to the size of Kosher Salt.
Step 3
Place the assembled rig on the scale then add your coffee.
Step 4
Make an anthill. Use something with a flat edge and gently concentrate the coffee grounds into a small mound in the center of the filter. The grounds should be pulled away from the sides of the filter as much as possible and the mound should stand on its own. Then create a button-sized indentation in the center of the mound – this is where you’ll pour the water. The finished product should look like an anthill. Once complete, zero the scale.
Step 5
This is a series of 3 pours and you’ll need your timer. Allow the boiling water to come down from a boil (nominally 175-190 degrees Fahrenheit).
Pour 1 (1 min 15 sec) – The goal is to pour 75 g of water in 75 seconds around the circumference of the mound. Don’t worry about soaking all the grounds in this step. This step allows the coffee to “bloom.”
~Wait 45 sec~
Pour 2 (1 min 20 sec) – Pour 100 g of water into the center of the filter. Again, the goal is to finish pouring the 100 g at the 1 min 20 sec mark.
~Wait 20 sec~
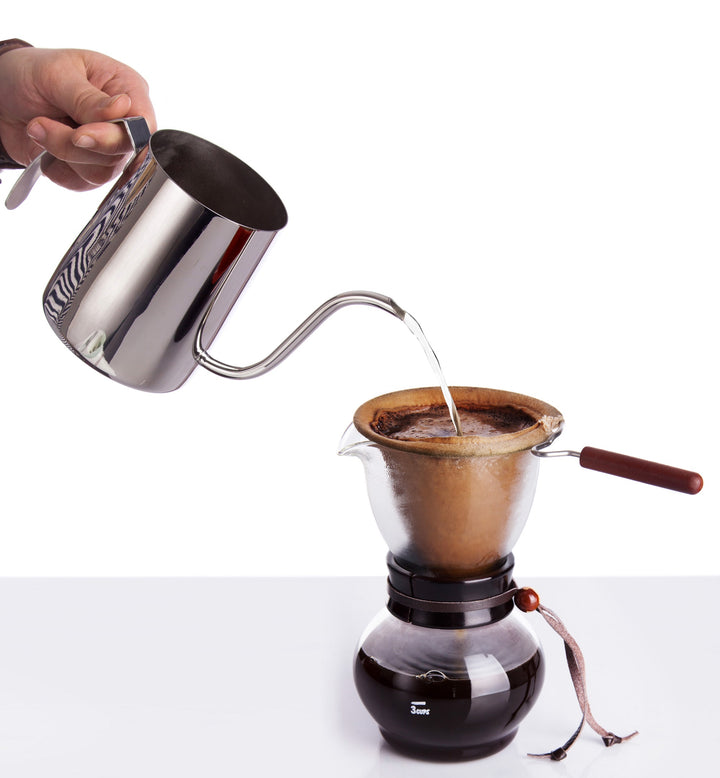
Pour 3 (1 min) – Pour the remaining 125 g of water into the center of the filter with the aim of reaching exactly 125 g at the 1 min mark.
Step 6
Remove the filter, serve and enjoy!
